Connecting a laser sensor correctly is crucial for ensuring accurate measurements, reliable operation, and safety in industrial environments. Whether used for distance measurement, object detection, alignment, or quality control, proper installation and wiring are foundational. This guide provides a comprehensive, step-by-step approach to connecting a laser sensor, covering electrical interfaces, mounting considerations, and configuration tips.
First, understand the sensor's specifications. Before any physical connection, review the datasheet for key parameters: output type (digital, analog, or serial communication like RS-485), voltage supply range (commonly 12-24 VDC), current consumption, and protection ratings (IP67 for dust/water resistance). Also, note the sensing range, response time, and any special features like background suppression or teach-in programming.
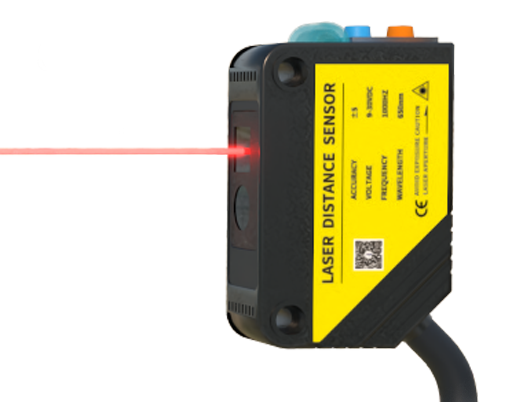
Step 1: Power Supply Connection. Most industrial laser sensors operate on DC voltage. Ensure the power source matches the sensor's requirements—typically 24 VDC is standard. Use a regulated power supply to avoid voltage fluctuations that could damage the sensor. Connect the positive wire (usually brown or red) to the positive terminal and the negative wire (blue or black) to the negative terminal. Double-check polarity; reverse polarity can cause permanent failure. For sensors with multiple cables, refer to the pinout diagram: V+ for power, 0V for ground, and others for outputs.
Step 2: Output Wiring. Laser sensors provide outputs to interface with controllers like PLCs, relays, or data acquisition systems. Common output types include:
- NPN (sinking) or PNP (sourcing) digital outputs: These switch a load to indicate detection. For NPN, the output connects to the load and then to ground; for PNP, it connects to the load and then to positive voltage.
- Analog outputs (0-10V or 4-20mA): These provide continuous signals proportional to distance or intensity. Connect the analog wire to the input module of a controller, ensuring proper shielding to reduce noise.
- IO-Link or serial interfaces: For smart sensors, use shielded cables and connect to compatible masters for digital communication and parameter setting.
Always use appropriate cables—shielded cables for analog or communication lines to prevent electromagnetic interference. Secure connections with screw terminals or M12 connectors, which are common in industrial settings for durability.
Step 3: Mounting and Alignment. Physical mounting affects performance. Securely mount the sensor on a stable surface using brackets, ensuring it is vibration-resistant. Align the laser beam precisely with the target; even slight misalignment can cause errors. Use the sensor's indicator LEDs (often green for power and yellow for output) to verify alignment. For reflective surfaces, adjust the angle to avoid direct glare, or use sensors with background suppression. Maintain the recommended sensing distance and avoid environmental obstructions like dust, steam, or extreme temperatures, which may require protective housings.
Step 4: Configuration and Testing. Many laser sensors offer configurable parameters via push-buttons, potentiometers, or software. Set the sensing mode (e.g., window mode for range-based detection), output logic (light-on/dark-on), and hysteresis to prevent chatter. For analog sensors, calibrate the output range to match the measured distance. After wiring, power on the system and test with targets at different positions. Monitor the output using a multimeter or PLC software to ensure signals correspond correctly. Check for stability and repeatability; if issues arise, re-inspect wiring, alignment, or environmental factors.
Step 5: Safety and Maintenance. Disconnect power before making any wiring changes. Follow lockout/tagout procedures in industrial plants. Regularly inspect cables for wear, clean the lens with a soft cloth to prevent residue buildup, and verify performance periodically. Document the wiring scheme for future troubleshooting.
In summary, connecting a laser sensor involves careful planning, correct electrical connections, precise mounting, and thorough testing. By adhering to manufacturer guidelines and industry standards, engineers can integrate these sensors seamlessly into automation systems, enhancing precision and efficiency in applications from robotics to material handling.