2026-06-04
Tech Hub
By 创始人
Mastering Fiber Optic Photoelectric Sensor Adjustment: A Professional Guide
Understanding Fiber Optic Photoelectric Sensors
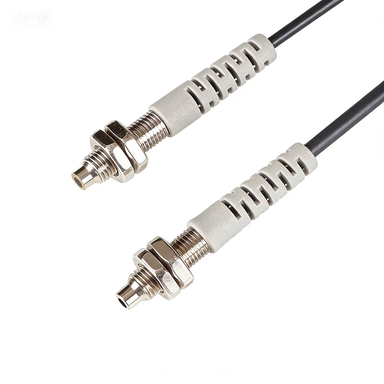
Fiber optic photoelectric sensors are critical components in industrial automation, offering high precision in detecting objects without physical contact. These sensors consist of a light source, a receiver, and a fiber optic cable that transmits light to and from the target area. Proper adjustment is essential for optimal performance, especially in harsh environments or when dealing with small, transparent, or reflective objects. As an electrical engineer, you must consider factors like sensing distance, ambient light interference, and target material properties before tuning the sensor.
Pre-Installation Calibration Steps
Before mounting the sensor, perform a bench calibration to establish baseline settings. Connect the sensor to a stable power supply (typically 10-30V DC) and verify the output type (NPN or PNP). Use a test target that matches the actual production material in size, color, and reflectivity. Adjust the sensitivity potentiometer or use the teach-in function if available. For fiber optic models, ensure the fiber ends are clean and properly aligned. A common mistake is to over-tighten the fiber connector, which can cause signal loss.
Fine-Tuning the Sensitivity
After installation, fine-tune the sensor in its actual operating environment. Begin with the sensitivity set to its minimum threshold, then gradually increase it until the sensor reliably detects the target. Use an oscilloscope or a multimeter to monitor the output signal during adjustment. For diffuse reflective sensors, place the target at the farthest expected distance and adjust the sensitivity until the output switches cleanly. For through-beam sensors, align the emitter and receiver fibers precisely, using a laser alignment tool if necessary.
Dealing with Background Interference
Background objects can cause false triggering. To mitigate this, use a background suppression function if your sensor supports it. Alternatively, adjust the sensing distance by using a fiber optic lens or a narrower aperture. In high-ambient-light conditions, shield the sensor head with a hood or use a modulated light source. For transparent objects, such as glass or plastic bottles, reduce the sensitivity and use a polarizing filter to minimize glare.
Dynamic Adjustment for Moving Targets
When sensing moving targets on a conveyor belt, consider the response time of the sensor. If the target moves quickly, select a sensor with a fast switching frequency (e.g., 1 kHz or higher). Adjust the hysteresis to prevent jitter around the detection threshold. Use a teach-in routine that samples multiple positions of the moving target to set the optimal switching point. Verify the adjustment by running production cycles and monitoring the output for missed detections or false triggers.
Common Troubleshooting Techniques
If the sensor fails to operate correctly, check the fiber optic cable for bends or breaks. Use a fiber optic power meter to measure light intensity at the receiver end. Verify that the sensor’s power supply is clean and within specifications. Reset the sensor to factory defaults and re-calibrate if necessary. In cases of electrical noise, route the sensor cable away from high-voltage lines and use shielded twisted-pair wiring. Document all adjustments for future reference and maintenance.