Laser distance sensors are critical components in various industrial, construction, and automation applications. Their precision in measuring distance, position, and level makes them indispensable. However, like any sophisticated electronic device, they can malfunction. This guide provides a practical, step-by-step approach to diagnosing and repairing common laser distance sensor issues, helping you restore functionality and avoid costly replacements.
The first step in any repair process is accurate diagnosis. Begin with a thorough visual inspection. Check the sensor's housing for any signs of physical damage, cracks, or dents. Pay close attention to the laser emission window and the receiver lens. Even a small amount of dust, moisture, oil film, or scratches on these optical surfaces can severely degrade performance, causing inaccurate readings or complete failure. Gently clean these surfaces using a soft, lint-free cloth and appropriate optical cleaning fluid. Never use abrasive materials or excessive pressure.
Next, verify the electrical connections. Loose, corroded, or damaged wiring is a frequent culprit. Power down the system completely before inspection. Examine the connector pins for bending or corrosion. Ensure the cable is not pinched, frayed, or exposed. A multimeter is essential here. Check the input voltage at the sensor's terminals to confirm it is within the specified range listed in the datasheet. Both over-voltage and under-voltage can cause erratic behavior or damage internal circuitry.
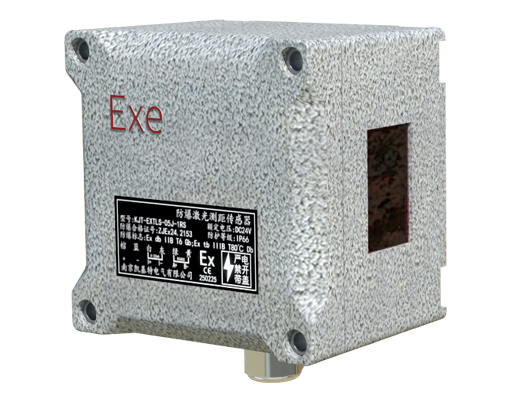
If power and connections are correct, proceed to test the sensor's output. Consult the manual for its output type (e.g., analog 4-20mA, 0-10V, digital RS232, RS485, or switching). For analog sensors, measure the output signal while targeting objects at known distances. Does the output change linearly and accurately? For digital sensors, you may need serial communication software to read the data stream. An output that is stuck at a maximum/minimum value, shows no change, or provides nonsensical data points to an internal fault.
Environmental factors are often overlooked. Laser sensors can be affected by extreme temperatures, high humidity, condensation, or strong ambient light. Ensure the operating environment matches the sensor's IP rating and temperature specifications. A sensor designed for indoor use may fail outdoors due to condensation inside the housing. Similarly, aiming a sensor at a highly reflective or transparent surface (like glass or liquid) can cause measurement errors. Testing the sensor in a controlled environment on a standard target can isolate these issues.
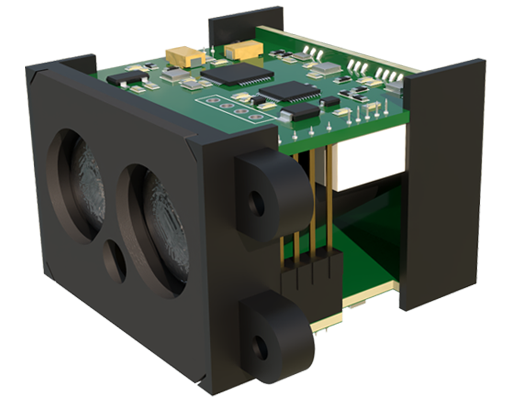
Internal component failure is the most complex repair scenario. Common internal problems include a failing laser diode, a degraded receiver (photodiode or PSD), or issues with the signal processing circuitry. Warning: opening the sensor housing may void warranties and expose you to invisible laser radiation. Only attempt this if you are qualified and have taken appropriate laser safety precautions.

If you must open the unit, do so in a clean, static-free environment. Look for obvious signs of damage on the printed circuit board (PCB): burnt components, bulging capacitors, or broken solder joints. Use a magnifying glass for a detailed inspection. Reflowing suspicious solder joints can sometimes resolve intermittent faults. Component-level repair, such as replacing a specific integrated circuit or transistor, requires advanced electronics skills and schematic diagrams, which are rarely provided by manufacturers.
Often, the most economical solution is module replacement. Many sensors have a modular design where the optical head (containing the laser and receiver) is separate from the main processing board. If diagnostics pinpoint the fault to the laser emitter or receiver, sourcing and replacing this module can be more feasible than a full board repair. Contact the sensor manufacturer or authorized distributors for spare parts.
Preventive maintenance is key to minimizing downtime. Establish a regular schedule for cleaning optical surfaces and checking connections. Keep sensors protected from harsh contaminants when not in use. Implement proper electrical safeguards like surge protectors and stable power supplies. Log sensor performance data over time to spot gradual degradation before it leads to a critical failure.
Finally, know when to seek professional help or replace the unit. If the sensor has sustained major physical or electrical damage, if internal repairs are beyond your capability, or if the cost of repair approaches that of a new unit, replacement is the prudent choice. Consider sending high-value sensors to specialized calibration and repair laboratories that have the proper equipment and expertise.
By following this logical troubleshooting sequence—visual inspection, connection and power check, output verification, environmental review, and cautious internal inspection—you can effectively address most common laser sensor failures, ensuring continued accuracy and reliability in your measurement systems.