Setting up a laser sensor correctly is crucial for ensuring accurate measurements and reliable performance in industrial applications. This guide provides a comprehensive, step-by-step tutorial for engineers and technicians to configure laser sensors effectively. Whether you're working on alignment, distance measurement, or object detection, following these procedures will help optimize sensor functionality and minimize errors.
First, understand the basic principles of your laser sensor. Most industrial laser sensors operate based on time-of-flight, triangulation, or phase-shift methods. Time-of-flight sensors calculate distance by measuring the time it takes for a laser pulse to reflect back, ideal for long-range applications. Triangulation sensors use a laser, a lens, and a detector to determine position based on the angle of reflected light, offering high precision for short distances. Phase-shift sensors analyze the phase difference between emitted and received laser waves, suitable for moderate ranges with good accuracy. Before installation, review the manufacturer's datasheet to confirm the sensor's specifications, including measurement range, resolution, response time, and environmental tolerances (e.g., temperature, humidity).
Begin with the physical installation. Choose a stable mounting location free from vibrations, as mechanical shocks can affect sensor accuracy. Ensure the sensor is securely fastened using appropriate brackets or mounts. Align the laser beam perpendicular to the target surface to avoid skewed readings; use alignment tools if provided. For reflective or dark surfaces, adjust the sensor angle slightly to reduce glare or absorption issues. Maintain a clean environment—dust or debris on the lens can scatter the laser, leading to inaccuracies. Regularly clean the lens with a soft, lint-free cloth and approved cleaning solution.
Next, connect the sensor to a power supply and control system. Most laser sensors require a DC power source, typically 12-24V, as specified in the manual. Use shielded cables to minimize electrical noise interference, especially in environments with motors or high-frequency equipment. Connect the output signals (e.g., analog voltage, current, or digital IO) to your PLC, data acquisition system, or controller. For analog outputs, calibrate the scaling to match your measurement range—for instance, set 0-10V to correspond to the minimum and maximum distances. Digital outputs often require configuring thresholds for object detection; use the sensor's teach-in function or software to set these points based on your application needs.
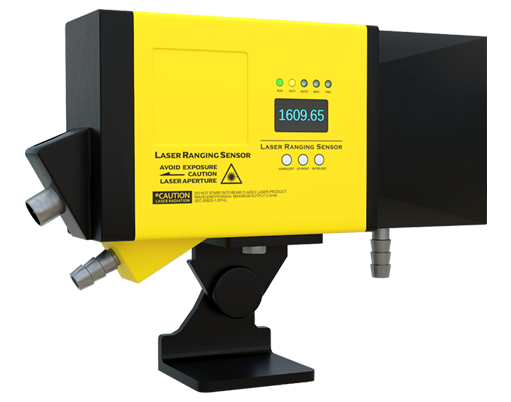
Configure the sensor settings via its interface. Many modern laser sensors feature built-in displays, buttons, or software for configuration. Access the menu to adjust parameters such as measurement mode (continuous vs. single-shot), filter settings (to smooth out noise), and response speed. Enable averaging filters if the target is moving or in unstable conditions, but balance this with response time requirements. Set the measurement rate appropriately—higher rates provide more data but may increase power consumption. For sensors with communication protocols like RS-485, Ethernet/IP, or PROFINET, configure the network settings to integrate with your industrial automation system. Use the manufacturer's software for detailed tuning, such as setting window comparators or logic functions.
Calibration is essential for accuracy. Perform a zero-point calibration by placing a reference object at a known distance and adjusting the sensor output to match. Some sensors offer auto-calibration features; follow the manual instructions to activate them. For triangulation sensors, ensure the target surface properties (color, texture) are consistent with calibration conditions, as variations can affect readings. Test the sensor with multiple points across its range to verify linearity. Document the calibration data for future reference and quality audits.
Finally, test and validate the setup. Simulate real-world conditions by moving targets at expected speeds or exposing the sensor to ambient light changes. Monitor the output signals using an oscilloscope or data logger to check for stability and noise. Adjust settings iteratively if readings drift or fluctuate. Implement error-handling routines in your control system, such as checking for signal loss or out-of-range values. Regular maintenance includes periodic recalibration, inspection of cables and connectors, and firmware updates from the manufacturer to ensure long-term reliability.

By following these steps, you can achieve optimal performance from your laser sensor. Proper setup not only enhances measurement precision but also extends the sensor's lifespan and reduces downtime in industrial operations. Always refer to the specific sensor manual for model-dependent details and safety guidelines.