Line laser sensors are critical components in industrial automation, precision measurement, and quality control systems. Over time, these sensors accumulate dust, oil, debris, and other contaminants that can scatter the laser beam, reduce measurement accuracy, and ultimately lead to system failure. Regular and proper cleaning is essential to maintain their performance and extend their operational life. This guide provides a systematic, industry-approved approach to cleaning line laser sensors safely and effectively.
Before initiating any cleaning procedure, the foremost step is to ensure complete safety and prepare the work area. Always power down and disconnect the sensor from its electrical source according to the manufacturer's lockout/tagout (LOTO) procedures. Allow the sensor to cool to ambient temperature if it has been in operation. Work in a clean, static-free environment to prevent introducing new contaminants or causing electrostatic discharge damage. Gather the necessary materials: lint-free wipes (preferably made from microfiber or specialized optical cloth), high-purity isopropyl alcohol (IPA, 99% grade or higher), compressed air or a clean, dry air duster, cotton swabs, and, if specified by the manufacturer, a recommended cleaning solution. Never use acetone, window cleaners, or other harsh solvents as they can permanently damage optical coatings and sensor housings.
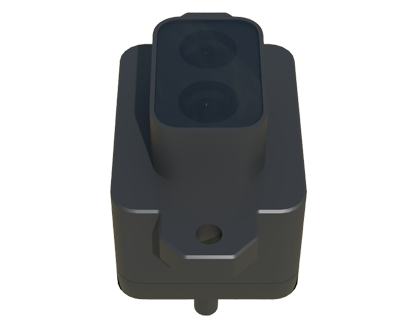
The cleaning process should be methodical. Begin by using the compressed air or air duster to gently blow away loose particulate matter from the sensor's exterior housing, ventilation slots, and the protective window or lens cover. Hold the canister upright and use short bursts to avoid spraying any propellant liquid onto the optics. Do not touch the lens with the air duster nozzle. For the critical optical surface—the laser emission window and the receiver lens—apply a few drops of high-purity IPA onto a fresh, lint-free wipe. Never pour liquid directly onto the lens. Using gentle, linear strokes from the center outward, wipe the lens surface. Avoid circular motions which can create swirl marks. Use a new, clean area of the wipe for each pass. For stubborn contaminants or tight corners around the bezel, a cotton swab lightly moistened with IPA can be used with delicate pressure.
After cleaning the optics, inspect the sensor's housing and mounting brackets. Wipe them down with a dry, lint-free cloth to remove grime. Ensure that any cooling fins or ventilation paths are clear of obstructions. Before reinstallation, allow the sensor to air-dry completely for a few minutes to let any residual IPA evaporate. Perform a visual inspection under good lighting, ideally using a magnifier, to check for any remaining streaks, smudges, or fibers on the lens. Once satisfied, you can reconnect and power up the system. It is highly advisable to conduct a functional test or recalibration as per the system's manual to verify that measurement accuracy has been restored.
Establishing a preventive maintenance schedule is key. The cleaning frequency depends entirely on the operating environment. A sensor in a clean, controlled lab may only need inspection every six months, while one in a machining, welding, or food processing environment might require weekly attention. Document each cleaning session, noting the date, methods used, and any observations about sensor condition or performance drift. This log aids in predicting maintenance needs and troubleshooting future issues. By integrating these cleaning practices into your regular maintenance routine, you ensure that your line laser sensors deliver reliable, precise data, minimize costly unplanned downtime, and achieve their maximum service life, protecting your investment in automation and measurement technology.