In modern industrial automation and precision measurement systems, laser sensors have become indispensable components. Their ability to provide non-contact, high-speed, and highly accurate detection makes them critical for tasks ranging from object positioning and edge detection to thickness measurement and defect identification. However, like any sophisticated electronic device, laser sensors are susceptible to anomalies that can trigger alarms, potentially halting production lines and causing significant downtime. Understanding the root causes of these alarms, implementing effective troubleshooting procedures, and establishing robust prevention strategies are paramount for maintaining operational efficiency.
A laser sensor anomaly alarm typically indicates that the sensor's output has deviated from its expected operational parameters. This deviation can manifest in various ways, such as a complete loss of signal, erratic readings, or a constant alarm state even when no target is present. The first step in addressing any alarm is to systematically identify the potential cause.
Common Causes of Laser Sensor Alarms:
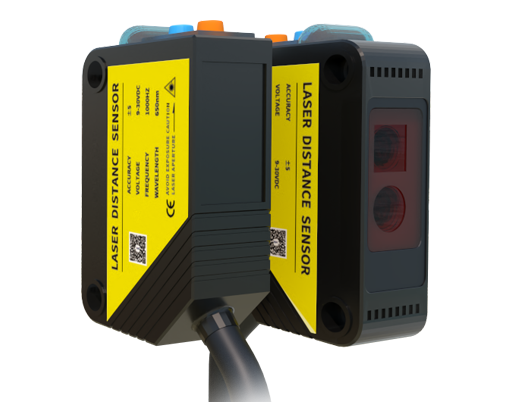
1. Environmental Contaminants: This is perhaps the most frequent culprit. Dust, oil mist, steam, or other airborne particles can accumulate on the sensor's lens or the optical window of the receiver. This contamination scatters or attenuates the laser beam, leading to a weak or non-existent return signal. In dirty environments like machining workshops or food processing plants, this is a constant challenge.
2. Incorrect Installation or Alignment: Laser sensors rely on precise alignment. Vibrations from machinery, accidental impacts, or improper initial mounting can cause the sensor to shift slightly. Even a minor misalignment can cause the beam to miss the intended target or the receiver to not capture the reflected light properly, resulting in measurement failure.
3. Electrical Interference and Power Issues: Industrial environments are electrically noisy. Electromagnetic interference (EMI) from variable frequency drives (VFDs), welding equipment, or large motors can disrupt the sensor's sensitive electronics, causing false readings or communication errors. Similarly, unstable power supply voltage—either sags or surges—can lead to erratic sensor behavior.
4. Target Property Changes: The performance of a diffuse-reflective laser sensor is highly dependent on the target's color, surface texture, and material. A change in the product being detected (e.g., from a white to a dark surface, or from a matte to a glossy finish) can drastically alter the amount of light reflected back to the sensor, potentially pushing it below the detection threshold.
5. Sensor Component Degradation: Over time, the laser diode itself can degrade, losing output power. The photodetector or internal circuitry may also fail due to age, thermal stress, or voltage spikes. This internal hardware failure will necessitate sensor replacement.
6. Incorrect Parameter Settings: Modern laser sensors are highly configurable. Settings such as sensing distance, response time, output logic (light-on/dark-on), and alarm thresholds must be correctly configured for the specific application. An improperly set hysteresis or an overly sensitive alarm threshold can cause nuisance alarms.
Structured Troubleshooting Methodology:
When an alarm occurs, follow a logical, step-by-step approach:
* Step 1: Visual Inspection and Basic Checks. Power down the system safely if possible. Inspect the sensor lens for dirt or damage. Verify all cable connections are secure and undamaged. Check the power supply voltage with a multimeter to ensure it is within the sensor's specified range.
* Step 2: Environmental Assessment. Observe the operating environment. Has there been a recent increase in dust, mist, or vibration? Has any new equipment been installed nearby that could be a source of EMI?
* Step 3: Target Verification. Confirm that the target is present within the sensor's specified sensing range and that its properties (color, material) have not changed from the original application setup.
* Step 4: Functional Testing and Isolation. If possible, test the sensor in a controlled, clean environment with a known-good target. Try swapping the sensor with an identical, known-working unit from a non-critical application to isolate the problem to the sensor itself versus the wiring or controller.
* Step 5: Parameter Review and Diagnostics. Consult the sensor's manual. Use its built-in diagnostic indicators (often LEDs) or connect to its software interface to review configuration parameters and check for error codes.
Prevention and Best Practices:
Proactive maintenance is far more cost-effective than reactive troubleshooting.
* Regular Cleaning Schedule: Establish a periodic cleaning routine using appropriate, lint-free cloths and approved cleaning solutions for optical components. Consider installing protective air purges or physical shrouds to keep contaminants off the lens.
* Secure Mounting and Vibration Damping: Use robust mounting brackets and ensure all fasteners are properly torqued. In high-vibration areas, use vibration-damping mounts to maintain alignment.
* Electrical Protection: Employ shielded cables and ensure proper grounding practices. Use line filters or isolated power supplies to protect sensors from electrical noise and transients.
* Environmental Control: Where feasible, use enclosures (rated appropriately for the environment, e.g., IP67) to protect sensors from harsh conditions. Control ambient temperature within the sensor's operating specifications.
* Documentation and Training: Maintain clear documentation of all sensor settings, locations, and part numbers. Train maintenance personnel on the specific types of sensors used and basic troubleshooting procedures.
By adopting a comprehensive approach that combines immediate, methodical troubleshooting with long-term preventive strategies, engineers and maintenance teams can significantly reduce unplanned downtime caused by laser sensor anomalies. Ensuring these critical components operate reliably is a key factor in achieving the high levels of availability and precision demanded by today's advanced industrial systems.