Laser distance sensors have become indispensable tools across various industries, from manufacturing and construction to robotics and logistics. Their ability to provide precise, non-contact measurements with high speed and reliability makes them a cornerstone of modern automation and quality control. For engineers and technicians, understanding the correct operation of these sophisticated devices is crucial for ensuring optimal performance, safety, and data integrity. This guide provides a detailed, step-by-step overview of the operational procedures for typical industrial laser distance sensors.
The first step in operating a laser distance sensor is proper installation and setup. Begin by securely mounting the sensor using the appropriate brackets or fixtures, ensuring it is stable and free from vibrations that could affect measurement accuracy. Pay close attention to the sensor's datasheet specifications regarding mounting orientation and environmental conditions. Most sensors require a clean, dry environment with minimal airborne particulates. Connect the sensor to a stable power supply as per the voltage and current ratings (commonly 12-24 VDC). Next, establish the communication interface. This typically involves wiring the digital outputs (e.g., PNP/NPN open collector, push-pull) or analog outputs (0-10V, 4-20mA) to your PLC, controller, or data acquisition system. For sensors with serial communication (RS-232, RS-485) or industrial Ethernet (EtherNet/IP, PROFINET), follow the protocol-specific wiring and network configuration guidelines.
Once physically installed, power on the sensor. Many models feature indicator LEDs that show power status and operational mode. The core of the setup process is configuration, which is often done via a built-in teach-in button, a handheld programmer, or dedicated software provided by the manufacturer. Using the software interface (usually connected via USB or Ethernet) is the most comprehensive method. Key parameters to configure include:
1. Measurement Mode: Choose between continuous measurement (streaming distance values) or single-shot/triggered measurement (taking a reading upon receiving an external command).

2. Output Scaling: Define the relationship between the measured distance and the output signal. For analog output, map the minimum and maximum measurement range (e.g., 100mm to 500mm) to the full output span (e.g., 0V to 10V). For digital communication, set the engineering units and data format.
3. Response Time/Filters: Adjust the sensor's response speed and apply digital filtering to stabilize readings in the presence of electrical noise or minor target surface variations. A faster response is needed for high-speed applications, while filtering aids in stability for static or slow-moving targets.
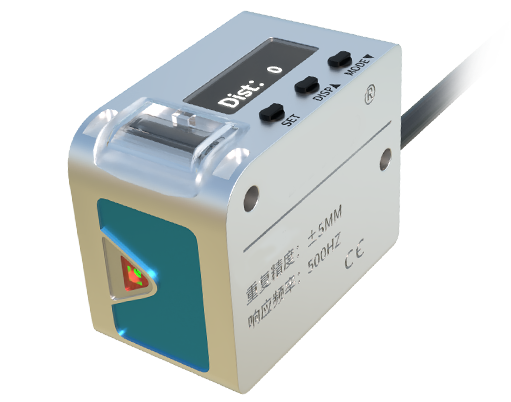
4. Teaching Reference Points: Use the "teach" function to program specific in-position and out-of-position setpoints. This is often done by placing the target at the desired reference distance and pressing the teach button or commanding it via software. These setpoints control the discrete digital outputs.
5. Laser Safety: Always ensure the laser is Class 2 or Class 1 for industrial safety, meaning it is eye-safe under normal operating conditions. Never look directly into the laser beam or point it at reflective surfaces that could deflect the beam. Most sensors have a laser enable/disable function that should be used during alignment.
Alignment is a critical phase. Activate the laser pointer (if equipped) to visualize the beam spot on the target surface. The target should be opaque, stable, and have a surface texture that diffuses the laser light adequately. Highly reflective, transparent, or absorbent (dark) surfaces can cause measurement errors or signal loss. Fine-tune the sensor's position so the beam is perpendicular to the target area of interest. For long-range measurements, use alignment tools like a sighting telescope (available on some models) to ensure accuracy.
During operation, continuously monitor the sensor's performance. Observe the stability of the output signal on your HMI or monitoring software. Most sensors provide status bits or error codes via their communication protocol to indicate issues like a weak signal, out-of-range condition, or internal fault. Regular maintenance involves keeping the front lens clean and free of dust, oil, or debris using a soft, lint-free cloth. Periodically verify measurement accuracy using a calibrated reference target at a known distance. Check all electrical connections for corrosion or looseness, especially in environments with high vibration or humidity.
Troubleshooting common issues is part of effective operation. If the sensor provides erratic readings or no reading, first check the target surface properties and alignment. Verify the power supply voltage and the load on the output circuits. Consult the sensor's manual for specific error code meanings. For communication failures, re-check baud rate, parity, and slave address settings against the host system's configuration.
In summary, proficient operation of a laser distance sensor extends beyond simply reading a distance value. It encompasses meticulous installation, thoughtful configuration based on the application's requirements, precise alignment, and diligent monitoring and maintenance. By adhering to these operational best practices, engineers can leverage the full potential of laser distance sensing technology, achieving high levels of precision, repeatability, and system reliability in their automated processes.