In the rapidly evolving landscape of industrial automation and IoT prototyping, the integration of laser sensors with user-friendly development platforms has become increasingly vital. Mixly, a graphical programming environment based on the Arduino ecosystem, offers a powerful yet accessible gateway for engineers to implement laser sensor control without delving deep into complex textual code. This article provides a detailed, professional guide on harnessing Mixly to interface with and command laser sensor modules, focusing on practical applications and robust system design.
Laser sensors, known for their precision in distance measurement, object detection, and alignment, typically communicate via digital or analog signals. Common types include time-of-flight (ToF) sensors, triangulation sensors, and simple laser break-beam modules. For this guide, we consider a widely adopted digital pulse-width modulation (PWM) output laser distance sensor, such as the VL53L0X, and a basic analog-output laser receiver pair. The core principle involves Mixly reading the sensor's output and executing logical operations to trigger actuators, display data, or communicate with other systems.
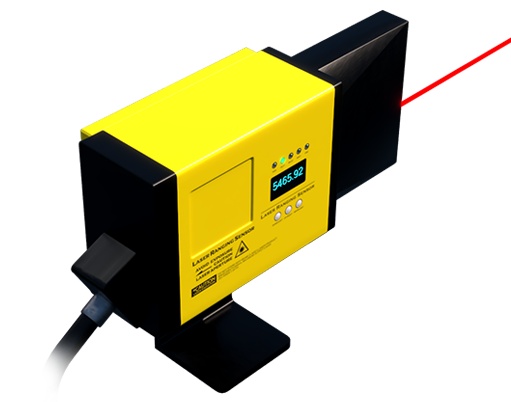
The first step is hardware integration. Connect the laser sensor to your microcontroller, typically an Arduino Uno or Mega. For a digital sensor like the VL53L0X, the connections involve SDA and SCL pins for I2C communication, along with VCC and GND. In Mixly, ensure the correct board type and port are selected. The software environment simplifies the inclusion of necessary libraries. Use the "Manage Libraries" or direct block import feature in Mixly to add the sensor-specific library (e.g., the VL53L0X library by Pololu). This is a critical advantage of Mixly: it abstracts library management into drag-and-drop blocks, reducing configuration errors.
Next, we construct the program logic using Mixly's visual blocks. The programming flow generally follows these steps:
1. Initialization: Drag the sensor initialization block from the relevant library category. This block sets up the sensor with default parameters, such as measurement timing and accuracy mode. Place it inside thesetup block to run once at startup.
2. Data Acquisition: In the mainloop block, use a "read distance" or "get sensor value" block. This block will output the measured distance in millimeters or a raw analog value. For analog sensors, use an "Analog Read" block on the designated pin.
3. Data Processing: Laser sensor data often requires filtering or thresholding. Utilize Mixly's mathematical and logical blocks. For instance, to create a stable reading, implement a simple moving average filter using variables and arithmetic blocks. To detect an object within a specific range, employ comparison blocks (e.g., "if distance > 100 and distance< 500").
4. Output and Control: Based on the processed data, define control actions. This could involve turning on a digital output to activate a relay or buzzer using a "Digital Write" block. For more advanced feedback, use serial communication blocks to send data to a PC monitor or LCD display blocks to show the real-time distance.
5. Error Handling: Incorporate checks for sensor validity. For example, if the sensor returns an error code (like out-of-range), use conditional blocks to set a default safe value or trigger a warning LED.
Consider a practical application: an automated safety curtain. A laser break-beam sensor is placed across a doorway. When the beam is interrupted (object detected), Mixly reads a low signal from the sensor's digital pin. The program logic, built with "if-else" blocks, immediately sends a high signal to a digital output controlling a relay, which halts a nearby motorized system. Simultaneously, an audible alarm is triggered via a piezo buzzer. The entire logic sequence is constructed visually, making the control flow transparent and easy to modify.
For engineers, optimizing performance is key. Mixly allows adjustment of the main loop speed. Avoid unnecessary delays; instead, use non-blocking timing logic with millis() function blocks to ensure the sensor is polled at consistent intervals without freezing other operations. When dealing with multiple sensors, organize code using functions (procedures blocks in Mixly) for each sensor task, enhancing modularity and readability.
Debugging is streamlined with Mixly's built-in serial monitor blocks. Continuously print sensor readings and internal variable states to verify hardware connections and logic accuracy. This iterative process of monitor-adjust is crucial for calibrating sensor thresholds and response times in real-world environments, which may involve ambient light interference for certain laser types.
In conclusion, Mixly democratizes the control of sophisticated components like laser sensors, enabling engineers to rapidly prototype and deploy automated systems. By leveraging its graphical interface, one can design complex, reliable control routines that bridge sensor data with physical actuators. This approach significantly accelerates development cycles, from conceptual design to functional prototype, while maintaining a high standard of engineering rigor necessary for industrial applications. The fusion of accessible programming and precise laser sensing opens vast possibilities in robotics, quality control, smart manufacturing, and beyond.