Understanding Photoelectric Sensor Fundamentals
Photoelectric sensors are indispensable components in modern industrial automation, used for detecting the presence, absence, or position of objects without physical contact. Their operation is based on the emission of a light beam, typically from an LED, and the reception of this beam by a photodetector. The core principle involves the interruption or reflection of this light beam by a target object. There are three primary sensing modes: through-beam, retro-reflective, and diffuse-reflective. In through-beam mode, the emitter and receiver are separate units; detection occurs when the object breaks the beam. Retro-reflective mode uses a single housing with both emitter and receiver, relying on a reflector to bounce the light back; the object is detected when it interrupts this return path. Diffuse-reflective mode, also a single-unit design, detects light reflected directly off the object itself. Selecting the correct sensing mode is the foundational step before any parameter adjustment, as it dictates the sensor's basic behavior and installation requirements.
Key Configuration Parameters and Their Functions
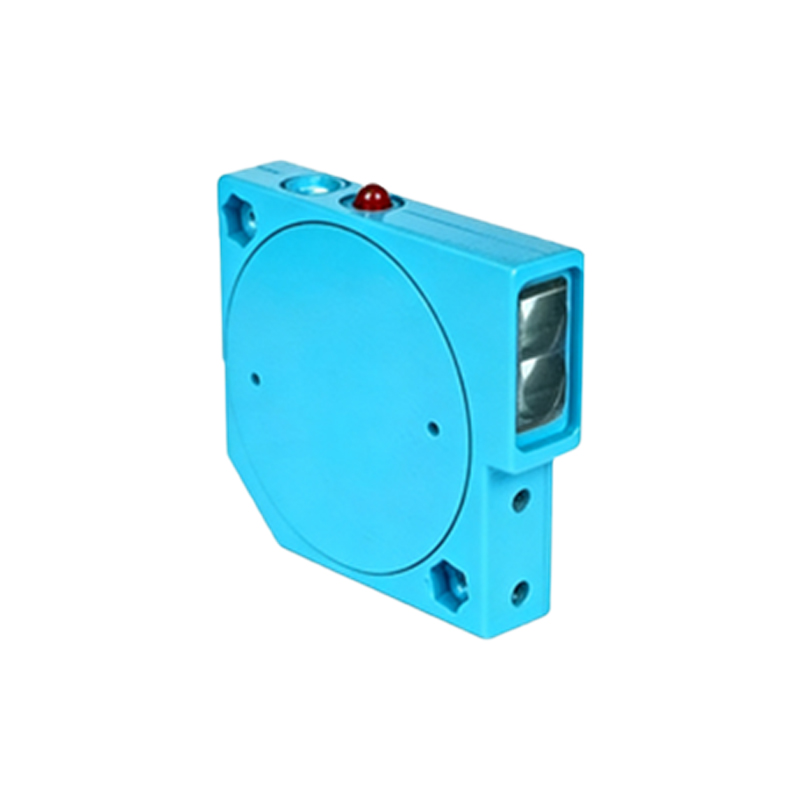
Once the appropriate sensor type is selected, configuring its internal parameters is crucial for reliable operation. The most critical setting is the sensitivity or threshold level. This parameter determines the minimum amount of light the receiver must detect to trigger an output signal. Setting it too high may cause the sensor to ignore valid targets, while setting it too low can lead to false triggers from background reflections or dust. Modern sensors often feature a teach-in function, where you present the target object and the sensor automatically calculates the optimal threshold. Another vital parameter is the response time or switching frequency. This defines how quickly the sensor can react to a change in state. For high-speed production lines, a fast response time (e.g., milliseconds or microseconds) is essential to avoid missing objects. Conversely, in environments with vibration or slowly moving objects, a slower response time can help filter out noise and ensure stable detection.
Adjusting for Environmental Challenges
Industrial environments present numerous challenges that can affect photoelectric sensor performance. Ambient light from factory windows or other machinery can interfere with the sensor's own light beam. Many sensors offer a "light-on" or "dark-on" mode selection, which defines the output logic relative to the received light level. Choosing the correct mode can help mitigate ambient light effects. For highly reflective backgrounds or shiny targets, background suppression technology is key. This advanced feature allows the sensor to ignore reflections beyond a set distance, ensuring it only detects objects within a specific range. Similarly, foreground suppression ignores close reflections. For sensors in dirty or dusty conditions, contamination indicators and automatic gain control are invaluable. These features monitor the lens condition and can either alert maintenance personnel or automatically boost the emitter power to compensate for accumulated grime, maintaining detection reliability over time.
Fine-Tuning with Timer and Logic Functions
Beyond basic detection, built-in timer and logic functions greatly enhance a sensor's versatility and integration into complex systems. ON-delay and OFF-delay timers are commonly used. An ON-delay timer only activates the output signal after the target has been detected continuously for a set period, useful for verifying a stable presence. An OFF-delay keeps the output active for a set time after the target is no longer detected, which can be critical for ensuring a process cycle completes. Some advanced sensors feature programmable logic functions, such as AND/OR gates or window comparators. For instance, a window comparator can be set to trigger an output only when the received signal strength is between two values, perfect for detecting translucent materials or ensuring an object is at a precise distance. Utilizing these functions can often eliminate the need for external controllers, simplifying the overall system design and reducing costs.
Practical Steps for Installation and Alignment
Correct mechanical installation and optical alignment are as important as electronic parameter settings. Always secure the sensor firmly to minimize vibration, which can cause alignment drift. For through-beam sensors, precise alignment of the emitter and receiver is critical. Use the sensor's alignment indicators, which are often LED lights that change color or pattern when optimal alignment is achieved. For retro-reflective sensors, ensure the reflector is clean and properly angled. When aligning diffuse sensors, consider the target's color, material, and surface texture, as these dramatically affect reflectivity. It is standard practice to perform alignment with the actual target material under normal operating conditions. After physical setup, run the target object past the sensor multiple times at the maximum expected speed to verify consistent detection. Document the final sensitivity setting and other parameters for future reference and troubleshooting.
Verification, Troubleshooting, and Maintenance
After configuration, a thorough verification process is essential. Use the sensor's built-in stability indicators or monitor its output with a PLC or signal light to confirm reliable switching. Common issues include intermittent detection, which may point to sensitivity being set at a marginal level, or consistent failure, which could indicate misalignment, a dirty lens, or an incorrect sensing mode selection. Always consult the manufacturer's datasheet for specific characteristics like sensing distance, minimum object size, and environmental ratings. Regular maintenance should include visual inspection of the lens for contamination and checking mounting hardware for tightness. Periodically re-verify the sensor's performance with a standard test target to ensure long-term reliability. By methodically setting parameters and following these best practices, engineers can ensure their photoelectric sensors deliver precise, dependable performance in demanding automation applications.