Setting up a BoYi laser sensor correctly is crucial for achieving optimal performance in various applications, from industrial automation to precision measurement. This guide provides a step-by-step approach to ensure a smooth installation and configuration process. Before beginning, always refer to the specific model’s user manual for detailed technical specifications and safety instructions.
First, ensure the working environment is suitable. Laser sensors are sensitive to external factors such as ambient light, dust, and vibrations. Install the sensor in a clean, stable location away from direct sunlight or strong artificial lighting. If the environment is harsh, consider using protective enclosures or housings to shield the sensor.
Next, mount the sensor securely using the appropriate brackets or fixtures. Alignment is critical—make sure the laser beam is perpendicular to the target surface for accurate readings. Use a spirit level or alignment tool if necessary. For distance or displacement sensors, maintain the recommended operating range specified in the manual. Improper mounting can lead to measurement errors or sensor damage.
Power connection comes next. BoYi laser sensors typically operate on DC voltage, such as 12V or 24V. Check the voltage requirements and connect the power supply accordingly, ensuring correct polarity. Use shielded cables to reduce electrical noise interference, especially in industrial settings with heavy machinery. Once powered, the sensor’s indicator lights should activate, signaling readiness.
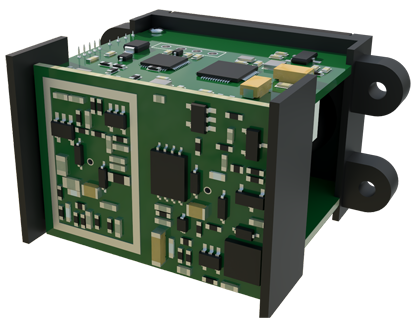
Configuration involves adjusting parameters to match your application. Most BoYi sensors feature push-button controls or software interfaces for setup. Key settings include measurement mode (e.g., continuous, single-point), output type (analog, digital, or RS-485), and sensitivity thresholds. For example, in object detection applications, set the trigger level to distinguish between target and background surfaces. Use the teach-in function if available—this allows the sensor to automatically calibrate based on a sample object.
Testing is essential after configuration. Place a test object within the sensor’s range and observe the output. Verify accuracy with calibrated tools if precision is required. Adjust settings iteratively until results are consistent. For networked sensors, integrate them with control systems like PLCs or PCs, ensuring communication protocols (e.g., Modbus) are correctly configured.
Regular maintenance prolongs sensor life. Clean the lens periodically with a soft, lint-free cloth to prevent dust buildup. Avoid using abrasive chemicals. Check connections for wear and tear, and recalibrate annually or as per operational demands. Troubleshoot common issues like erratic readings by reviewing environmental factors or electrical connections.
In summary, proper setup of BoYi laser sensors hinges on careful planning, precise installation, and methodical configuration. By following these guidelines, users can harness the full potential of these devices for reliable, high-performance operations. Always prioritize safety and consult technical support for model-specific queries.