Setting up a laser displacement sensor correctly is crucial for achieving high-precision, reliable measurements in industrial automation, quality control, and robotics applications. These non-contact sensors, which operate on the principle of triangulation or time-of-flight, project a laser spot onto a target surface and calculate displacement based on the reflected light's position or return time. A proper setup ensures data integrity, system stability, and longevity of the sensor itself. This guide outlines the key steps and considerations for an optimal installation and configuration.
First, select an appropriate mounting location. The sensor must be securely fastened to a stable, vibration-free structure using the recommended brackets or fixtures. Even minor vibrations can introduce significant noise into measurement data. Ensure the sensor’s optical axis is perpendicular to the target surface within the manufacturer's specified tolerance (often a few degrees). Angled installation can cause cosine error, leading to inaccurate readings. Consider environmental factors: protect the sensor from excessive ambient light, dust, oil mist, or temperature extremes that exceed its specifications. Using protective air purge accessories or enclosures may be necessary in harsh environments.
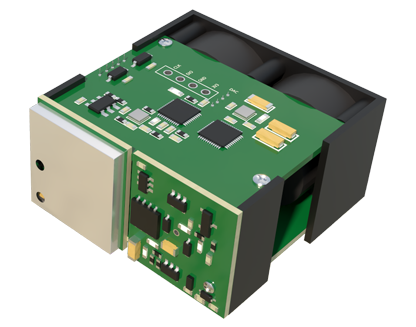
Next, establish a reliable electrical connection. Connect the sensor to a stable power supply that matches its voltage and current requirements (commonly 12-24V DC). Voltage fluctuations can affect laser output and signal processing. Use shielded cables and follow proper grounding practices to minimize electrical noise interference. Connect the output signals—which may be analog (e.g., 0-10V, 4-20mA), digital (e.g., RS-422, Ethernet/IP), or switching outputs—to your controller, data acquisition system, or PLC. Verify that wiring matches the sensor's pinout diagram to prevent damage.
Power on the sensor and proceed with initial optical alignment. Many modern sensors feature a visible red or blue laser for easy alignment. Project the laser spot onto the target's measurement point. Use the sensor's mounting adjustments or alignment aids (like built-in cross-hair lasers) to position the spot precisely. The spot should be clear and focused. For triangulation sensors, ensure the spot falls within the receiver's detection area; an indicator LED or software tool often confirms this. Maintain the working distance specified in the datasheet, as measurements are most accurate within the sensor's defined "reference distance" or "standoff" range.
Now, configure the measurement parameters via the sensor's teach-in buttons, digital interface, or dedicated software. Key settings include:
1. Measurement Range and Reference Point: Set the effective measurement span. Often, you "teach" two points—the near and far limits of the target's expected movement—to define the output scaling.
2. Output Type and Scaling: Select the required output signal and map the displacement range to the full output scale (e.g., 2mm displacement = 10V output).
3. Filtering: Apply digital filters (like moving average or low-pass filters) to smooth data and reduce noise, but avoid over-filtering that slows response time.
4. Sampling Rate: Adjust based on application speed. High-speed processes require a high sampling rate, but this may increase noise.
5. Switching Outputs: If used for limit detection, set the trigger thresholds (ON/OFF points) with appropriate hysteresis to prevent chattering.
After configuration, perform validation tests. Move a known reference target (e.g., a precision gauge block) through the measurement range and compare the sensor's output to the actual displacement. Check linearity, repeatability, and hysteresis. Ensure the sensor performs consistently across different surface colors, materials, and textures; some sensors have modes to compensate for varying surface reflectivity. Document all settings for future reference.
Regular maintenance is part of the setup longevity. Periodically clean the lens with approved materials to prevent dust accumulation. Re-check alignment and calibration during routine system checks, especially after mechanical disturbances. Monitor output stability and investigate any drift promptly.
In summary, meticulous mechanical mounting, careful electrical integration, precise optical alignment, and thoughtful parameter configuration form the foundation of a successful laser displacement sensor setup. Adhering to these steps maximizes measurement accuracy, enhances process reliability, and ensures the sensor delivers optimal performance throughout its service life in demanding industrial environments.