In the realm of industrial automation and precision measurement, laser sensors are indispensable tools. Their accuracy and reliability hinge significantly on the condition of their optical components, particularly the protective lens or window. Over time, this lens can become contaminated with dust, oil, or debris, or it may sustain physical damage from particulates in harsh environments. This contamination or damage scatters or attenuates the laser beam, leading to inaccurate readings, signal loss, or complete sensor failure. Simply cleaning the lens is often the first remedy, but when cleaning is insufficient due to scratches, coatings damage, or permanent stains, lens replacement becomes a necessary maintenance procedure. This guide provides a detailed, industry-standard procedure for safely and effectively replacing the lens on a typical industrial laser sensor.
Pre-Replacement Preparations and Safety
Before initiating any work, paramount importance must be placed on safety and preparation. First, consult the sensor's specific technical manual or datasheet from the manufacturer. This document is crucial for identifying the correct replacement part number, understanding the sensor's disassembly method, and noting any special warnings. Second, execute a controlled shutdown. De-energize the sensor by locking out and tagging out (LOTO) the power source to the entire machine or control circuit. This prevents accidental activation, which could cause injury or damage. Third, gather all necessary tools and materials. Typically, this includes the correct replacement lens, a set of precision screwdrivers (often Torx or hex keys), lint-free wipes, optical-grade cleaning solvent (like isopropyl alcohol), compressed air or a clean air blower, anti-static gloves, and a clean, static-free work surface. The new lens should be handled only by its edges while wearing gloves to prevent fingerprints and electrostatic discharge.
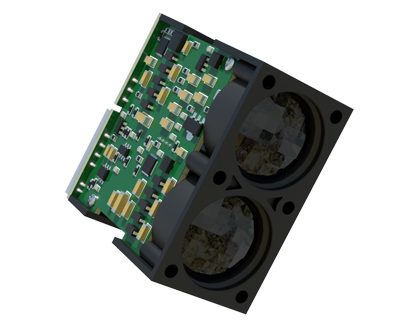
Step-by-Step Replacement Procedure
1. Sensor Removal (If Required): Depending on the installation, you may need to carefully un-mount the sensor from its bracket. Note its orientation and wiring before disconnecting any cables. Labeling cables and taking photographs can aid in reinstallation.
2. Housing Disassembly: Using the appropriate tool, carefully remove the screws or fasteners securing the sensor's front housing or lens retaining ring. Place these small components in a secure container to avoid loss. Gently separate the housing sections. Be mindful of any O-rings or gaskets that provide environmental sealing; inspect them for wear and set them aside carefully.

3. Old Lens Removal: The old lens is usually seated in a recess or held by a retainer. It may simply lift out, or a retaining clip might need to be gently pried open. Avoid using excessive force or metal tools directly on the lens housing to prevent scoring or deformation. If the lens is cracked, handle it with extra care to avoid scattering fragments.
4. Cleaning the Cavity: With the lens removed, use a blast of clean, dry compressed air to remove loose particulate matter from the internal sensor cavity. Do not touch the internal emitter or receiver optics. If necessary, use a lint-free swab lightly moistened with optical solvent to clean the lens seat, then dry thoroughly with air. Ensure no fibers or residue remain.
5. New Lens Installation: Remove the new lens from its protective packaging. Holding it by the edges, inspect it for any defects. Align it correctly in the housing seat—some lenses are directional. Gently press it into place, ensuring it sits flat and even. Reinstall any retaining clips or rings, tightening screws to the manufacturer's specified torque in a cross-pattern to ensure even pressure and avoid warping.
6. Reassembly and Sealing: Reinstall any O-rings or gaskets. Carefully mate the housing halves, ensuring no wires are pinched. Replace and tighten all fasteners securely to maintain the sensor's IP (Ingress Protection) rating. If the sensor was removed, remount it to its bracket and reconnect all electrical connections, verifying they are secure and correct.
Post-Replacement Verification and Calibration
The job is not complete after mechanical reassembly. Once power is safely restored, a functional test is mandatory. Observe the sensor's indicator LEDs (if present) for normal operation. Perform a basic verification by placing a target object within its sensing range and confirming a stable output signal on a multimeter or the PLC input. For analog or measuring sensors, a full recalibration against a known standard may be required as per the manufacturer's instructions, as a new lens can slightly alter the optical path. Document the maintenance activity, including the date, sensor ID, and part number of the installed lens, for future traceability.
Common Pitfalls to Avoid
* Using Incorrect Tools: Using a standard Phillips screwdriver on a Torx head can strip the fastener.
* Over-tightening: This can crack the new lens or distort the housing, breaking the environmental seal.
* Poor Cleaning: Installing a new lens into a dirty cavity will lead to immediate re-contamination.
* Ignoring Seals: Damaged or missing O-rings compromise the sensor's resistance to dust and moisture, leading to premature failure.
* Skipping Verification: Assuming the sensor works without testing can lead to downstream process errors or quality defects.
Regular inspection and timely lens replacement are proactive maintenance strategies that extend sensor life and ensure continuous, reliable system operation. By following this systematic approach, technicians can maintain the critical optical integrity of laser sensors, safeguarding measurement accuracy and production quality.