Laser distance sensors have become indispensable tools in modern industrial automation, offering high-precision, non-contact measurement for a wide range of applications. Proper installation is critical to ensuring optimal performance, accuracy, and longevity of these sophisticated devices. This guide outlines key considerations and step-by-step procedures for installing laser distance sensors in industrial environments.
Before installation, carefully review the sensor's datasheet and user manual. Confirm the sensor's specifications, including measurement range, accuracy, laser class, output interfaces, and environmental ratings. Ensure the selected sensor is suitable for the application, whether it's for object detection, positioning, level monitoring, or dimensional inspection.
The first step is selecting an appropriate mounting location. The sensor should be mounted on a stable, vibration-free surface to prevent measurement errors caused by movement. Use sturdy brackets or mounting fixtures designed for industrial use. The mounting point must provide a clear, unobstructed line of sight to the target. Avoid locations with excessive dust, steam, or strong ambient light, as these can interfere with the laser beam. For outdoor or harsh environments, ensure the sensor has an adequate IP (Ingress Protection) rating and consider using protective housings if necessary.
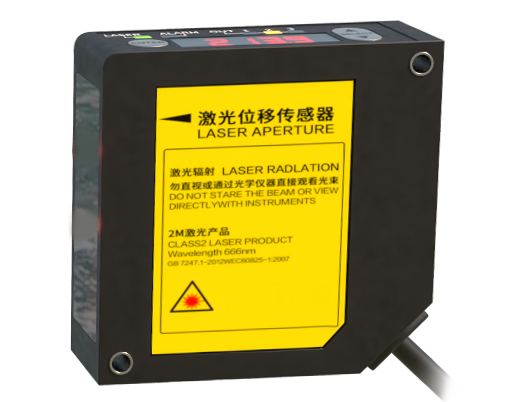
Alignment is crucial. The sensor's laser beam must be perpendicular to the target surface for accurate distance measurement. Even a slight angular deviation can introduce a cosine error, significantly affecting readings. Use alignment tools provided by the manufacturer, such as alignment lasers or visual indicators. For fixed installations, securely tighten all mounting hardware after precise alignment. For applications requiring periodic repositioning, use adjustable mounts that can be locked in place.

Electrical connections must follow proper industrial wiring standards. First, ensure all power is disconnected. Connect the power supply according to the sensor's voltage requirements (commonly 12-24 VDC). Use shielded cables to minimize electromagnetic interference (EMI), especially in environments with motors, drives, or welding equipment. Route signal cables (analog outputs like 4-20 mA or 0-10 V, or digital interfaces like RS-232, RS-485, or Ethernet) separately from power lines. Securely ground the sensor and cable shields at a single point to prevent ground loops. Always adhere to local electrical codes and safety regulations.
After physical and electrical installation, configure the sensor parameters. This typically involves setting the measurement mode, output scaling, response time, and any application-specific functions via software, teach-in buttons, or external controllers. Perform a functional test by measuring a known distance to verify accuracy. Establish a regular maintenance schedule to clean the lens with appropriate materials, check mounting stability, and inspect cables and connectors for wear.
Common installation pitfalls include incorrect mounting angle, inadequate protection from environmental factors, poor cable management leading to signal noise, and neglecting periodic calibration checks. By meticulously planning and executing the installation process, engineers can ensure laser distance sensors deliver reliable, precise data, enhancing the efficiency and safety of automated systems.